SMS messages
Use the SMS Messages view to send a message to an individual recipient or as a broadcast to a larger audience.
You must have rights to:
- View SMS chat queue
- View directory group and its directory entries
- Messaging rights for an SMS chat queue from which SMS messages are sent
If you cannot see the view and need to send an SMS, contact your administrator.

To send an SMS:
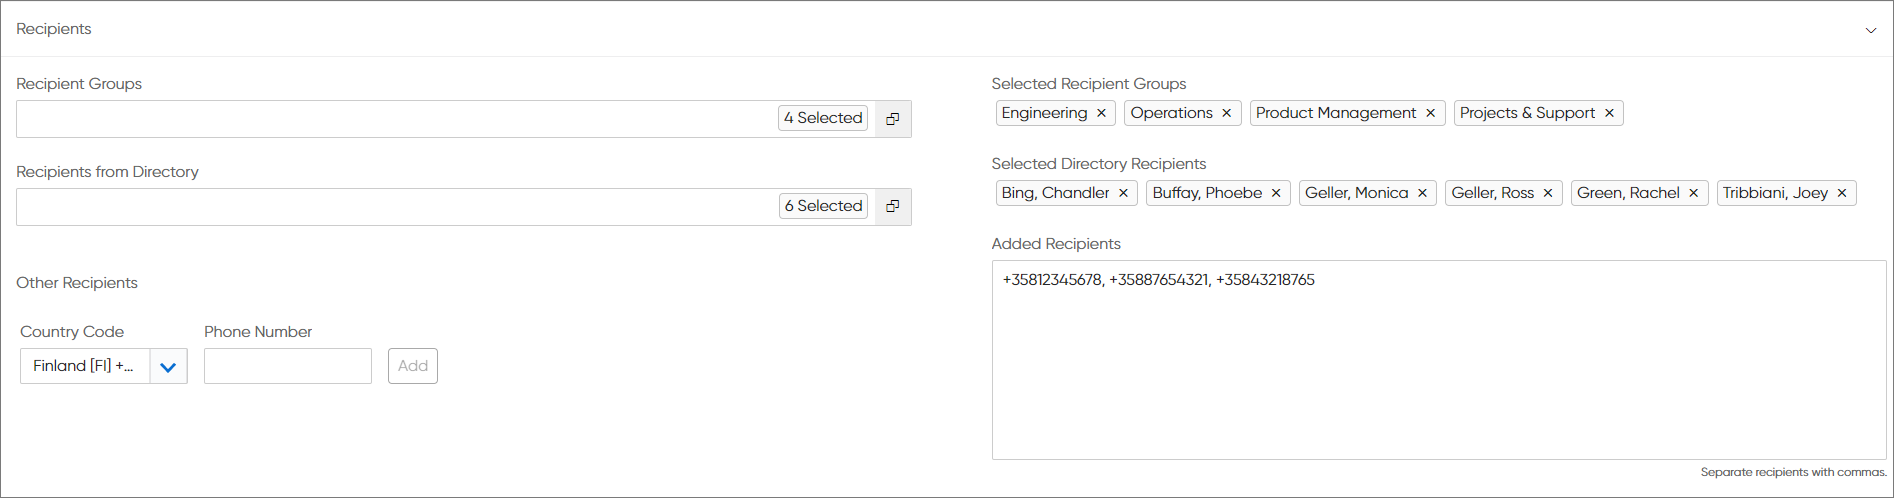
- Select recipients. You can do this in four ways:
-
Select a directory group or several groups in the Recipient Groups field. You can type in the field to find a group. The number of recipients is the number of entries in that directory group. Selected recipient groups are shown on the right.
Note:For a directory recipient to receive an SMS, a mobile number must be specified in their directory entry. You can add a number in Communication Panel and System Configurator.
To remove a recipient group, click the X icon next to its name under Selected Recipient Groups or deselect the group in the Recipient Groups dropdown.
-
Select individual recipients from the directory in the Recipients from Directory field. You can type in the field to find a recipient. You'll only see recipients with a mobile number in their directory entry. Selected recipients are shown on the right.
To remove a recipient, click the X icon next to their name under Selected Directory Recipients or deselect the recipient in the Recipients from Directory dropdown.
-
Enter phone numbers in the Other Recipients fields and click Add. You'll see added recipients on the right.
-
Alternatively, you can paste recipients from an external source into the Added Recipients field. Separate phone numbers with a comma and space.
-
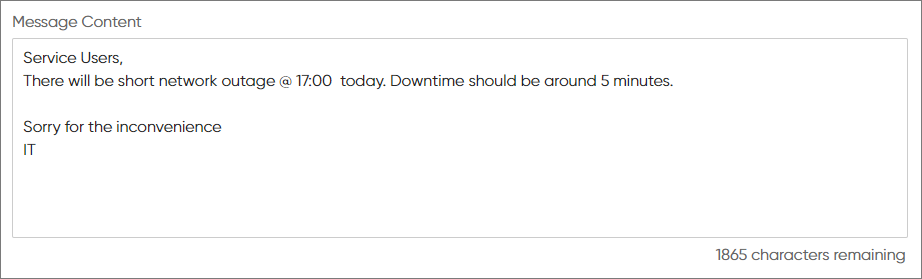
- Write the message in the Message Content field. You can also
paste text into the field. If you've moved to the SMS Messages view from the
Disruptions view, the disruption details have been carried over.
- In the Send from field, select the queue which the SMS message is to be sent from.
- If you want to:
- send the message right away, click Send
- schedule sending for later:
- Select Send Later.
- Define the date and time.
- Click Send.
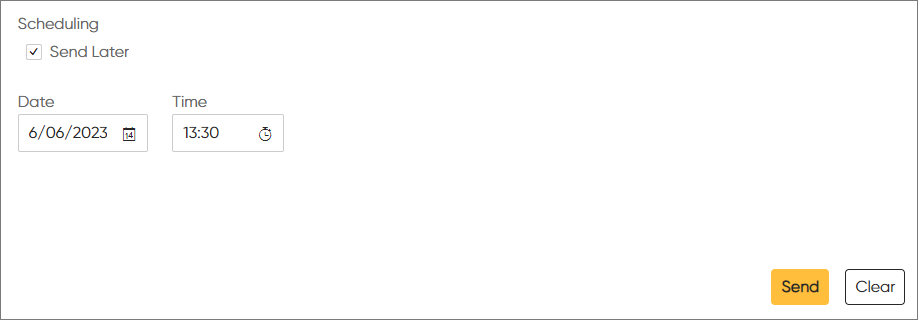
To empty the view without sending the message, click Clear. If you leave the view without clearing, you'll see your previously filled view when you return.
You can see sent messages in Dashboard's Conversations view or Communication Panel's History view.