Configuring Sinch Conversation API
When using Sinch Conversation API as a messaging service, you should configure all webhooks with a secret to enable digital signature verification in Sinch Contact Pro . You must configure the same webhook secret in Sinch Contact Pro to use this secret to verify the digital signature.
In Sinch Conversation API, webhooks are configured per app, and each webhook has its own secret. In the System Configurator (SC) application, only a single webhook secret can be configured per messaging service and it applies to all apps within that messaging service. But if your project extends over multiple messaging services, one webhook secret per service is needed. For example, if you have apps in different regions but the project is the same, you need to configure two messaging services.
- sms
- telegram
- viber
- viber-bot
(From 16th December 2020)
Regarding the changes introduced by Facebook (applies to Facebook Messenger & WhatsApp) to comply with new privacy rules in Europe, rich content will only be delivered if it contains an image file, for any other type of file (audio, video) message will not be sent.
This condition impacts you if:
- Your app points to messenger bot which is created for a European page.
- Your app points to messenger bot which is created for a page that has European admins.
- You send a message to customers in Europe.
Until Facebook restores this feature, you can send a message as a Text Message
with plain text URL which points to audio/video
file.
If you are setting up a SMS channel, inform Sinch of the phone number you want to use for outbound SMS messages. Currently, you cannot configure this number yourself.
Prerequisites
You have created and configured your project and apps API in Sinch Portal (https://dashboard.sinch.com/login). For instructions, see https://developers.sinch.com/docs/conversation.
Procedure
-
Go to .
- Choose Add New and sinchconversation.
- In the Basics block, enter:
- Name for your service
- Service connection of format https://[landscape either eu or us].conversation.api.sinch.com/v1/projects/[project ID]/messages:send
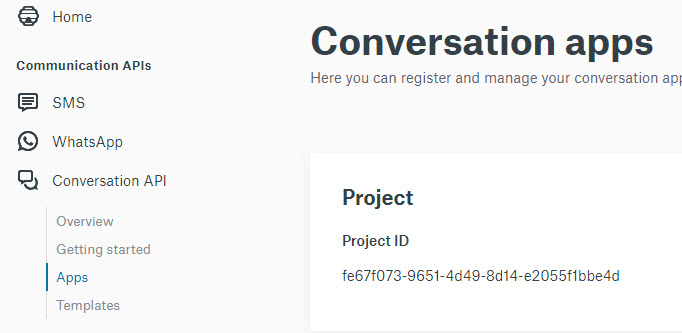
You get the Project ID from .

- In the Authentication block, define authentication for
outbound messaging (consisting of key ID and app ID) and inbound messaging
(webhook).
- Enter your username and password. The username is of format [Key
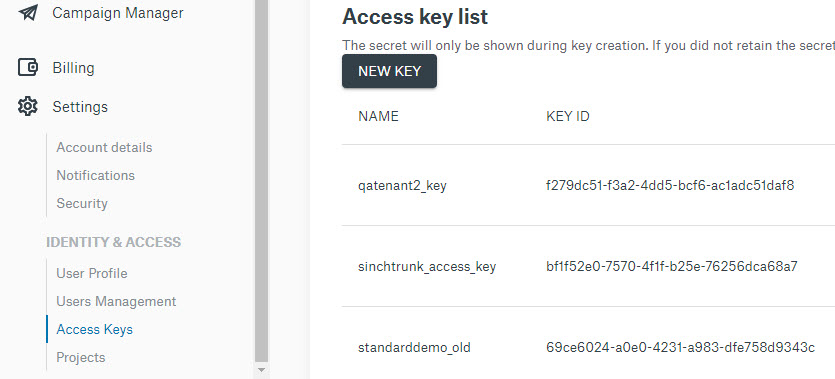
ID]@[App ID]. You get the Key ID from .

App ID is in .

The password is the secret in .
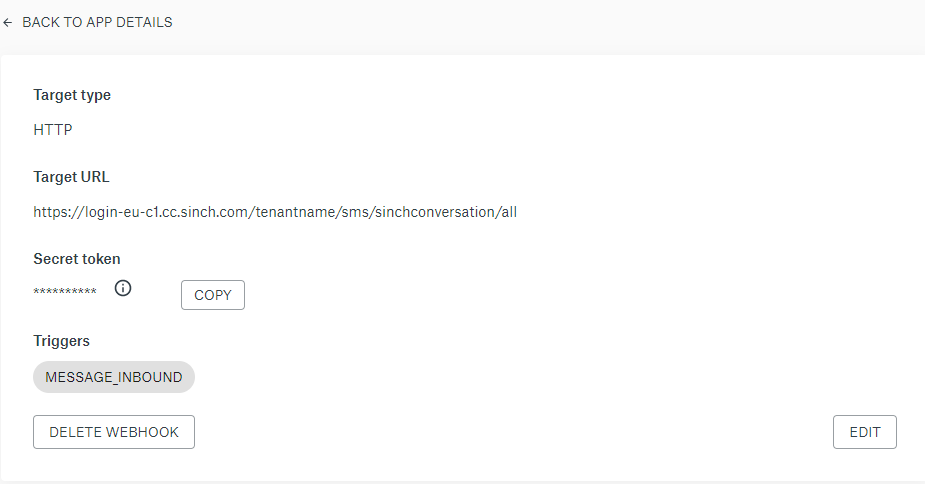
- Enter webhook and then retrieve your app’s secret from
 .The target URL depends on your region and may also be one of the following:
- https://cc365-us-w2.sapcctr.com/[tenantname]/sms/sinchconversation/all
- https://login-au-s2.cc.sinch.com/[tenantname]/sms/sinchconversation/all
Make sure you have chosen MESSAGE_INBOUND as a trigger. For error reports, you can also add MESSAGE_DELIVERY.
- Enter your username and password. The username is of format [Key
ID]@[App ID]. You get the Key ID from .
- Save your new messaging service.
- Go to and create a queue. The queue address is of format [app ID]@[subchannel].sinchconversation.com, for example 01E4556565565ERKYO@whatsapp.sinchconversation.com.Make sure to capitalize the letters in the app ID when you enter it. Sinch Conversation API generates app IDs in capital letters and the System Configurator must use the same format in the queue address and messaging service configuration.
