Sinch SMS
Sinch SMS allows you to send and receive SMS messages from and to your Sinch Contact Pro system.
Prerequisites
-
SMS number from Sinch available on your Sinch Customer Dashboard account
Note: When setting up Sinch SMS, inform Sinch of the phone number you want to use for outbound SMS messages. Currently, you cannot configure this number yourself. -
SMS server installed and configured. For an example setup, see Direct Facebook Messenger Integration.
-
The following information from your administrator:
-
Callback URL, which is typically of the following format: http[s]://[smsserverlocalhttpserverip:port]/sms/sinchsms/sms
Callback URL tells Sinch SMS where to direct an arriving message.
-
Public IP address of the SMS server. Sinch SMS support may request this information.
-
Configuring your Sinch SMS integration
-
Log into Sinch Customer Dashboard and select . The APIs page opens:
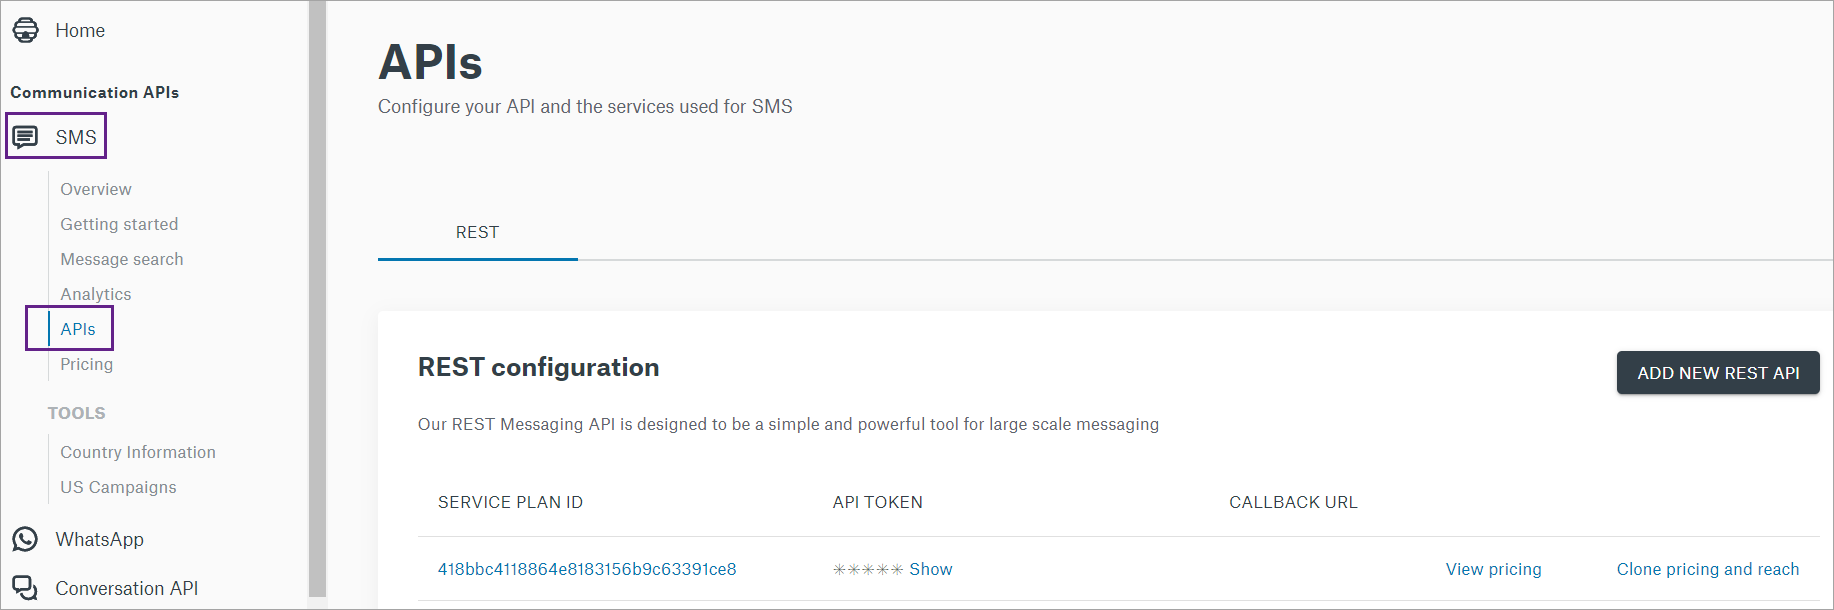
-
Add a new Sinch SMS configuration or modify an existing one, and add the Callback URL you received from your administrator into your configuration:
-
Click the Service Plan ID shown as a blue link. The REST API details page opens:
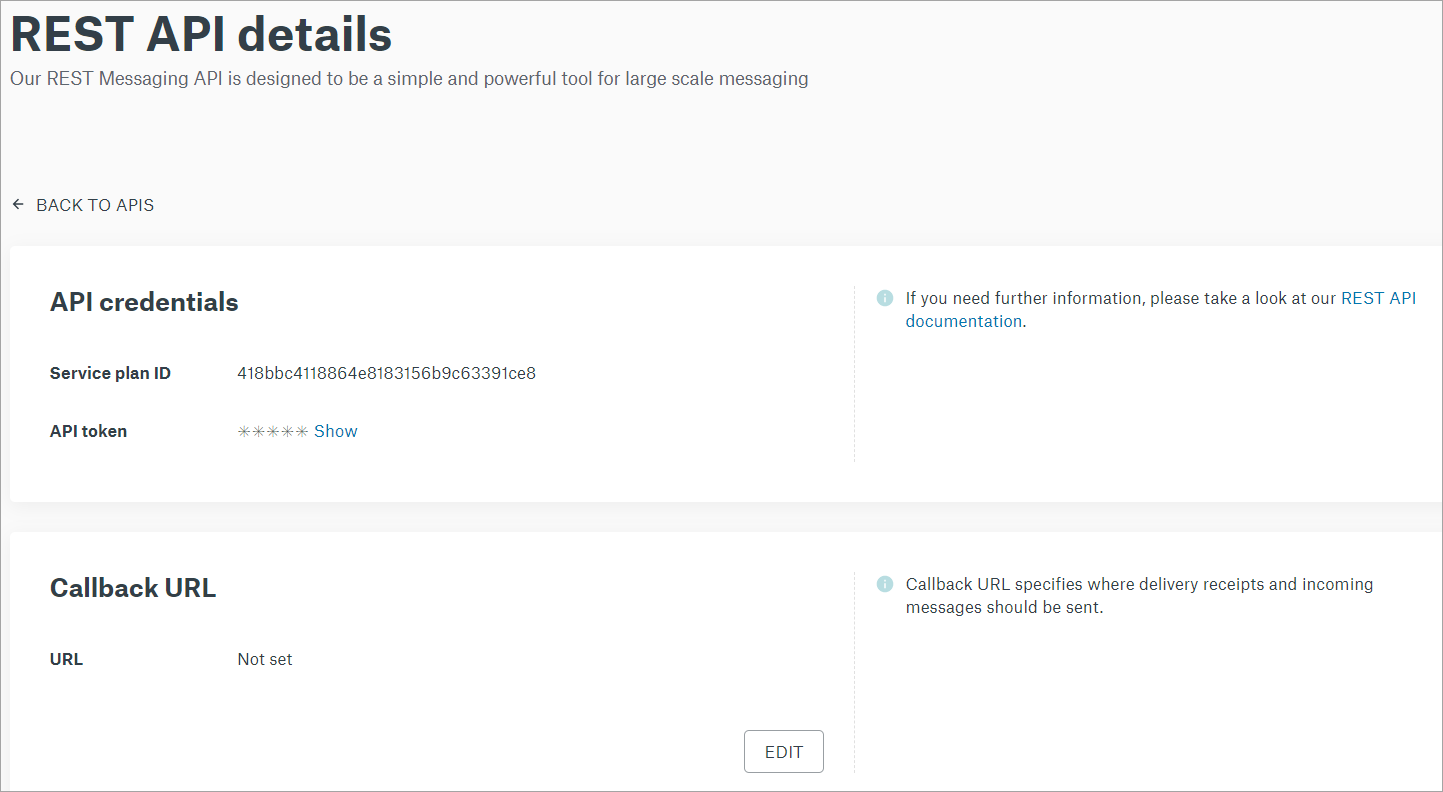
-
In the Callback URL section, click EDIT and copy-paste the callback URL.
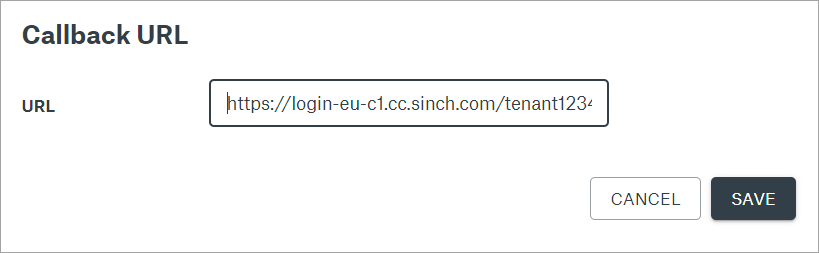
-
Click SAVE.
Your Sinch SMS service is now configured. Next, you will need to configure the integration into Sinch Contact Pro .
-
- Define the following SMS Server variables in Infrastructure
Administrator (IA):
-
Local HTTP Server Address
-
Local HTTP Port
-
Local HTTP Certificate (optional)
If HTTPS in not used then certificates are not necessary. But if you use HTTPS, the certificate name should be same as the server address (IP address or domain name)
-
Choose one of the options below for HTTP Proxy Policy:
Named: Give the HTTP proxy address in the HTTP Proxy Name field
Automatic: the proxy setting will be taken from the Internet options of the HAC user
Default Proxy: Retrieves the static proxy or direct configuration from the registry. This option is deprecated in OS win 8.1 and newer.
No Proxy: No proxy is used.
-
HTTP Proxy Name:
The address of the proxy server if the value Named is selected for HTTP Proxy Policy
-
Use Authentication:no/yes
-
Install a USERTrust RSA Certification Authority certificate on the server where SMS Server is running.
-
-
Start System Configurator and navigate to .
-
Click Add New and select sinchsms.
-
Enter the settings for your Sinch SMS connection:
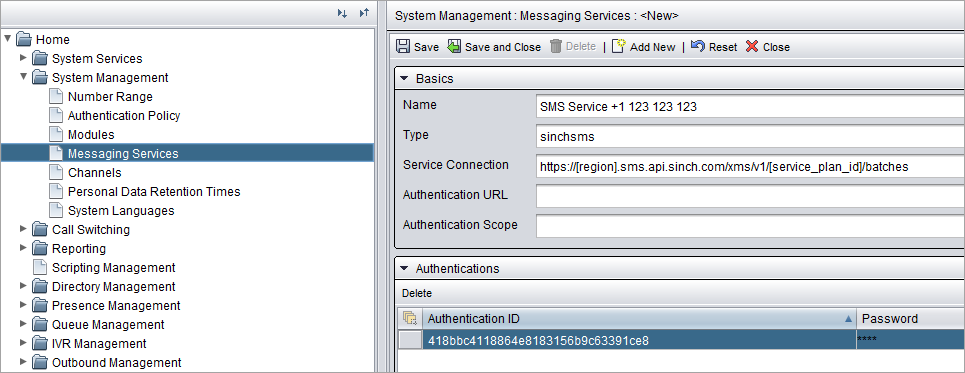
- Name: Name your connection, for example SMS Service +1 123 123 123.
- Service Connection: Define the URL for service connection in
the following format:
https://[region].sms.api.sinch.com/xms/v1/[service_plan_id]/batches
If necessary, check your region from Sinch SMS support. Copy and paste your Service plan ID from the REST configuration in Sinch Customer Dashboard.
Tip: Read more about Sinch SMS URLs at: https://developers.sinch.com/docs/sms/api-reference/ - Extend the Authentications block and add the following data
from Sinch Dashboard:
- Authentication ID: Service plan ID
- Password: API token
-
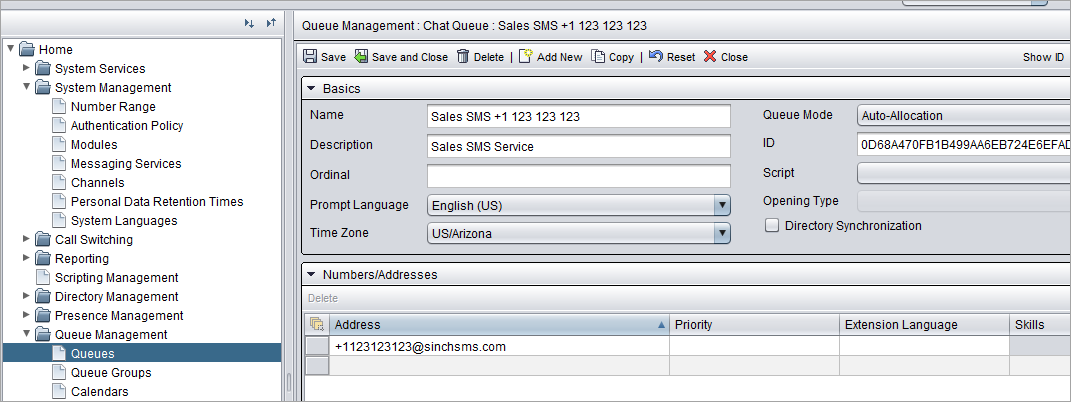
Save and navigate to Queue Management in System Configurator.
-
Create a new Chat Queue. The queue address is of format: [phone number in international format]@[service]. For example:
+358401234567@sinchsms.com
-
Make sure agents have serve rights to the newly created queue.
Your Sinch SMS integration is now complete and ready for use.