Creating Templates
You must have rights to create directory templates.
You use this procedure to create templates that:
-
List the database table fields at which the search in the Communication Panel application is targeted
-
Define the fields which are available for different Communication Panel user groups
The templates are applied to users through user settings templates (Directory).
The system contains default templates.
Do not create unnecessary templates because directory maintenance jobs may get slow if several templates are saved in the system.
To add a template:
- On the System Configurator main screen, choose .
- Choose Add New.
A screen area with relevant assignment blocks appears.
- In the Basics block, enter the name for the template.
You can also enter an optional description.
Note:Defining search result list is not supported in Communication Panel. -
In the Tab Sheet List block, create the titled groups for Communication Panel:
-
Enter the name by double-clicking the first row ( Name ).
-
Choose the language.
For example, if you enter [Additional info] in French, the French name is displayed when the user interface language in Communication Panel is French.
-
To change the order in which the title appears in Communication Panel, double-click the row in Ordinal and change the value.
-
To add more titled groups, choose Add New.
-
-
In the Tab Sheet block, choose the directory fields that you
want to include in each titled group.
Note:The following fields are not supported in Communication Panel:
- Language
- Presence
- Profile Name
- Return Info
- Time Difference
- Time Zone
Make sure that the correct name in the Tab Sheet List block is activated before you start choosing the directory fields.
Note:Do not choose both Image File and Image Link for the same template. We recommend that you use Image File since Image Link is for special cases.
-
Hold down Ctrl, click on the field names you want to add and then click the Move to List icon.
-
Choose the field position.
-
To adjust the field width, double-click the row and change the value.
-
Choose the field type.
-
Choose how many rows the field contains.
-
If you want to include the field in the search in , choose Yes in the Search Enabled field.
-
If you want the data in a particular field to be shown only in a certain language, choose the language.
To change the order in which the fields appear in Communication Panel, double-click the rows in Ordinal and change the values.
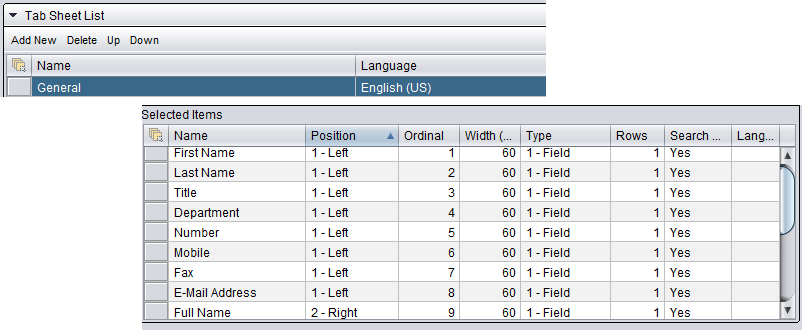
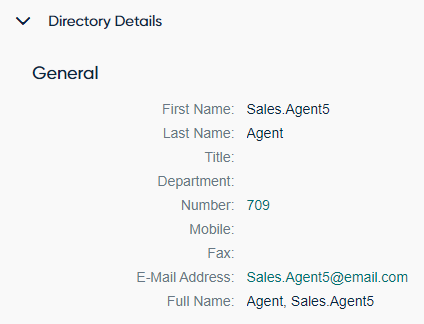
Figure 1. Titled Group and Its Fields in Communication Panel - For information about how to use the Access Rights assignment block, see Access Rights.
- Save your entries.