Send a message to a mobile number
When you send out a message to a mobile number, the address that is displayed for the recipient is a queue address, not your personal chat address or phone number.
- serve rights to a SMS/RCS/Viber Business/WhatsApp queue to see that option in the context menu
- serve rights to the queue that is used as a sender address
To send a new message:
Do one of the following:
- Using the + (Create New) button:
Click the button and choose which type of message you want to send:

- In the Directory:
-
Find the person you want to send the message to.
-
Click on their phone number.
-
Choose which type of message you want to send.
-
- In the History view:
-
Find the conversation with the customer you want to send the message to. You can view the list of all conversations or the detailed view.
-
Click on the phone number.
-
Choose which type of message you want to send.
-
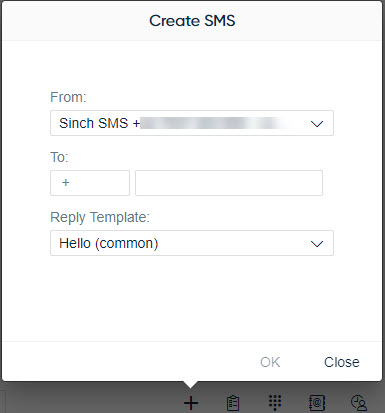
A popup window appears:
- Using the + (Create New) button:
- In the From field, choose the address you want to use as a sender.
By default the system selects the last option used. If you don't see a queue in the
From field, either you don't have serve rights to it or it's not of
type @sinchsms.com or
@<subchannel>.sinchconversation.com. Contact your administrator if
necessary.
If administrators have defined templates for the queue, they are available in the Reply Template list. If the queue has a specific reply template defined, it's automatically selected for the Reply Template field. If you don't want to use a template, choose (None).
- Enter the recipient's phone number in the To fields in one of the following ways:
- Copy-paste the full phone number, including the country code, into the second To field. The system identifies the country code automatically and splits the phone number into the two fields.
- Add the country code and remaining phone number separately:
- If a country code prefix is not provided by default, select it from the list by typing in + and the number, or search by the country name or two-letter country code.
- Enter or paste the remaining phone number into the second To field.
- Click OK.
- Enter the text, or if administrators have defined a reply template for the queue, check the text and edit it if necessary.
- Click the Send button.