Managing IVR Applications
You must have rights to create, view and modify custom IVRs and phone extensions.
- On the System Configurator main screen, choose .
- In the Basics block, configure the
settings according to the following table.
Table 1. Basic settings of custom IVRs Setting Description Name Enter a descriptive name for the IVR. Description Enter additional information about the IVR. Active To activate the IVR, select this option. Note:Do this only after the IVR application is ready without any errors.Add Custom IVR to Reported Applications To include the IVR application in reporting, select this option. Early Queuing To use early queuing function with the IVR application, select this option. Make sure that there is either the connect element in this IVR to connect the call and end early queuing, or there is the transfer element that takes the call to a queue where early queuing is in use. - In the IVR Numbers block, define the phone number for
this IVR application.
Use one of the numbers reserved for this purpose in .
Note:Make sure you don't use any national emergency number as an IVR, a user, or a queue number. - Either create a new application, or import a VoiceXML file.
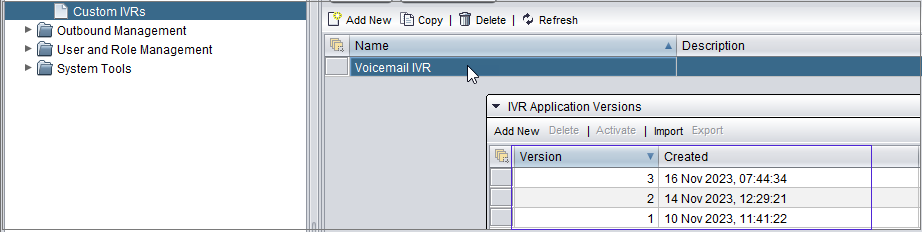
- When you develop an application, you may save several versions of it in the
IVR Application Versions block in the following ways:
-
To create a new IVR application, click Add New; the IVR Editor opens. Enter elements or blocks according to your plan.
-
To edit an existing IVR application, double-click the appropriate version row. You can edit any of the versions, and it does not affect the other existing versions. See Using IVR Editor for more information about editing.
-
To add a new version to an existing IVR application, search the application and double-click it, and click Add New. To add a new version that is based on a specific version and not the latest one, choose the version first, and then click Add New.
-
To import a VoiceXML file, either choose Add New, or choose the application and its version, and then click Import and select the file. See Importing and Exporting IVR Applications.
-
To edit an existing application by editing the VoiceXML code directly, export the application, edit code, and import back again. Note that only supported elements and attributes are imported.
- Choose the right version, and click Activate. Only one version of an IVR application can be active at a time, and one version must be active.
Note:-
Do this only after the IVR application is ready without any errors.
-
Even if no error icons are displayed, there can be undetected logical errors that prevent IVR from running. When activating an IVR for the first time, pay attention to IVR Generator Log at the bottom of screen for possible errors.
-
- If the IVR requires a customizer, add and activate it in the Customizers block. To call the customizer method, add the customstate element and define its Method Name attribute.
- To define opt-in and survey IVRs, define appropriate parameters in Survey IVR Settings block. For more information, see Survey IVR.
- If the IVR application requires that custom parameters are set in the system, you can define them as name/value pairs in the Custom Parameters view.
- Click Save to save and apply the changes.
Managing IVR Applications
- To edit IVR applications or to activate or deactivate existing IVR applications, choose .
- Click Search. A list of existing IVR applications appears.
- To display all versions of an application, double-click its row. You can choose any of
the versions for use or for editing.
- To activate the IVR, select the Active checkbox..
- To deactivate the IVR, remove the selection from the Active checkbox.
- To edit and IVR application, double-click the version you want to edit and make your changes.
- Save your entries.