Configuring Communication Panel extensions
Communication Panel extensions can be either video assistance extensions by Sinch or custom third-party extensions developed by third-party vendors or system integrators.
Changing the Communication Panel extension settings requires Communication Panel to be restarted for the changes to take effect.
Third-party extensions
Embed only trusted third-party web applications into the extension area. It is also your responsibility to check and know the data you expose to these applications.
Prerequisites
-
You have created the extension. For more information, see the Examples section in Communication Panel Third-Party Extension Messaging API.
-
You need rights to create or modify Communication Panel extensions and view queues, users, and user groups
Configure a third-party extension
-
On the System Configurator main screen, choose .
-
Click Add New.
A popup window opens.
-
Select Third-party.
An empty third-party extension configuration appears.
-
In the Basics block, enter the following information.
Field Description Name
Enter a name for the extension. The name is only shown in System Configurator.
Description
This field is optional but you can enter a free-form description for the extension.
Title
Enter a title for the extension. The title is shown in Communication Panel.
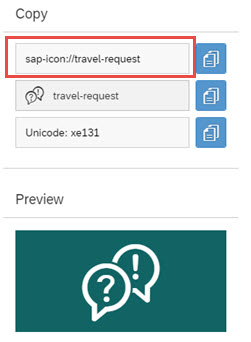
Icon
Enter the icon name:-
Go to SAPUI5 Icons.
-
Search for the icon and then choose it.
-
Copy the name to the Icon field.
URL
Enter the location of the third-party extension.
Ordinal
Define the listing order of the extensions. The range is from 1 - 100, 1 being at the top of the listed extensions in the Communication Panel extension area. If you enter 0 or leave the field empty, the extension will be shown at the top of the listed extensions in the CP extension area. If you use the same ordinal number for different extensions shown in the same views, CP will show them in alphabetical order.
Extension placement in Communication Panel:
-
Hidden
Select this option if the extension is not to be seen in the Communication Panel UI. This setting is typically used for automated background processes that do not require any agent interaction while handling incoming conversations.
-
Global (Built-in)
Selecting this option makes the extension built-in. These extensions are always hidden, start automatically at user login and remain active throughout the session. They are for more complex client-side integrations where an automated background process is required.
-
Different views: Select the views where the extension area is accessible for the agents.
The following table explains how the Conversations view behaves with different configurations.
Conversations view defined Any other views defined Queue defined Third-party extension behavior No No N/A Extension isn't shown in any view. No Yes N/A Extension is always shown in defined views. Yes Yes N/A Extension is always shown in defined views. Yes No Yes Extension is shown when conversation arrives to defined queue(s) or when a defined queue is used for an outgoing conversation. Yes No No Extension is shown in empty conversation view and only for direct incoming and outgoing calls. -
-
Add the queues for which you want the extension to be used.
Note:If your extension is used in outgoing calls (for example, for fetching customer information from a CRM), you must also define queues. The queue's number is used as the visible A number and shown to the customer in an outgoing call.
-
For agents to be able to see the extension on the Communication Panel user interface, add View rights to user groups, roles, or users.

-
Save the extension.
For more information about creating third-party extensions, see the Examples section in Communication Panel Third-Party Extension Messaging API.
Video assistance extensions
With video assistance, it's possible for a Communication Panel agent to invite the customer to share video from their mobile device during a phone call. The customer's shared video is shown in the Video assistance extension in Communication Panel. The video is one-way from the customer to the agent.
This extension is available for the agent in Communication Panel if the agent has the necessary rights and the call has arrived in one of the queues defined for the extension. For more information on the needed configurations for video assistance, see the Video assistance document.
Prerequisites
You need rights to create or modify Communication Panel extensions and view queues, users, and user groups
Configure a video assistance extension
On the System Configurator main screen, choose .
Click Add New.
A popup window opens.
Select Video assistance.
An empty third-party extension configuration appears.
In the Basics block, enter the following information.
Field Description Name
Enter a name for the extension. The name is only shown in System Configurator.
Description
This field is optional but you can enter a free-form description for the extension.
Title
Enter a title for the extension. The title is shown in Communication Panel.
If you're configuring several video assistance extensions for the same queue(s), make sure the titles are different so the agent knows which one to open. You can also use different icons (see below) to identify the extensions.
Icon
We suggest using icon sap-icon://web-cam. If you want to use a different icon:
-
Go to SAPUI5 Icons.
-
Search for the icon and then choose it.
-
Copy the name to the Icon field.

URL
Enter the URL to the customer-facing user interface (UI).
If you'd like to use the ready-made UI we've provided, add the URL https://ext-cc365.cc.sinch.com/video-assistance/en/index.html.
If you want to create your own customer-facing UI instead, see instructions in Github.
Ordinal
Define the listing order of the extensions. The range is from 1 - 100, 1 being at the top of the listed extensions in the Communication Panel extension area. If you enter 0 or leave the field empty, the extension will be shown at the top of the listed extensions in the CP extension area. If you use the same ordinal number for different extensions shown in the same views, CP will show them in alphabetical order.
Extension placement in Communication Panel:
To enable this extension, select the Conversations view field. To disable the extension, deselect the field.
-
In the Video assistance block, enter the following information.
Field Description Sinch Voice & Video app secret
The name of the secret of your Sinch Build app in Secrets manager
Invitation URL
URL of video assistance resource for inviting the customer
The URL is formed in the following way:- Europe: https://login-eu-c1.cc.sinch.com/[TENANT]/visitor/ecfs/RI/cmi/url/redirect/
- North America: https://login-na-w2.cc.sinch.com/[TENANT]/visitor/ecfs/RI/cmi/url/redirect/
- Australia: https://login-au-s2.cc.sinch.com/[TENANT]/visitor/ecfs/RI/cmi/url/redirect/
- Africa: https://login-af-s1.cc.sinch.com/[TENANT]/visitor/ecfs/RI/cmi/url/redirect/
Invitation message
Enter the message you want the agent to send to the customer when inviting them to share video. You can specify the location of the link in the text by using the placeholder {LINK}. If you don't use the placeholder, the link will be added to the end of the message.
In the Queues block, add the queues for which you want the extension to be used.
Note:You must also define queues for outgoing calls. The queue's number is used as the visible A number and shown to the customer in an outgoing call.
Add the following rights to agents for user groups, roles, or users:
View right to the Communication Panel extension: object type Communication Panel extensions
right to user service Video assistance
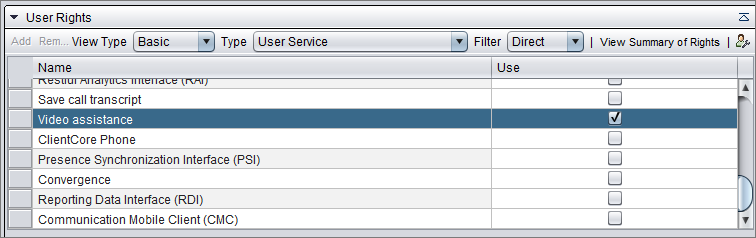
Serve right to the SMS queue used for sending the invitation

Save the extension.