Voicemail IVR
You can use this example voicemail IVR to create tasks out of voicemail messages.
Principle
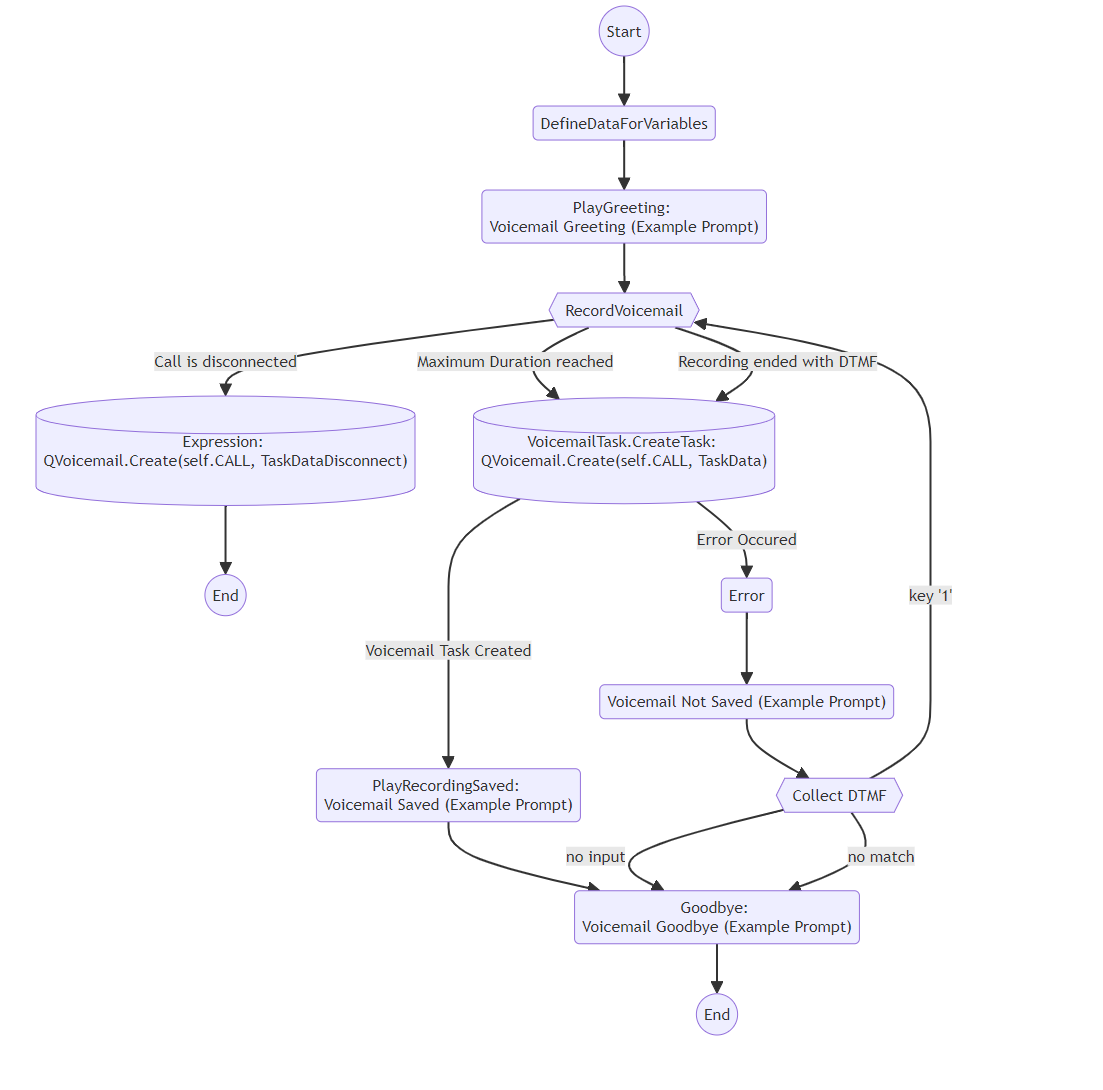
The image below shows the voicemail IVR flow.
Prerequisites
You need a task queue for the voicemail tasks. For information about creating a queue, see Creating Queues.
If you don't want to use the example audio prompts, record your own and create prompt files according to the instructions.
Creating Your Custom Voicemail IVR
- On the System Configurator main screen, choose .
- In the Basics block, configure the
settings according to the following table.
Table 1. Basic settings of custom IVRs Setting Description Name Enter a descriptive name for the IVR. Description Enter additional information about the IVR. Active To activate the IVR, select this option. Note:Do this only after the IVR application is ready without any errors.Add Custom IVR to Reported Applications To include the IVR application in reporting, select this option. Early Queuing To use early queuing function with the IVR application, select this option. Make sure that there is either the connect element in this IVR to connect the call and end early queuing, or there is the transfer element that takes the call to a queue where early queuing is in use. - In the IVR Numbers block, define the phone number for
this IVR application.
Use one of the numbers reserved for this purpose in .
Note:Make sure you don't use any national emergency number as an IVR, a user, or a queue number. - To import the example file you've received from Sinch, click Import in the IVR Application Versions view, go to the folder where the example is located, and choose Example_Voicemail_IVR.xml.
- Save your entries.
- Check and modify at least the following in IVR Editor:
- Assign the correct audio prompts or remove prompts if they are not
necessary.
The example audio prompts are:
Table 2. Prompt Content Voicemail Greeting (Example Prompt) The person you are trying to reach is currently not available. Please leave a message after the tone.
Voicemail Not Saved (Example Prompt) Saving voice message failed. If you want to try again, press [one].
Voicemail Saved (Example Prompt) Voice message saved
Goodbye (Example Prompt) Goodbye
- Go to EmailQueueAddress and enter the email queue
address where the voicemail tasks are created.

This must be an extension address in an existing email queue but it doesn't need to be a real email account address. In this case, deselect the option Sender and don't define an email server in
- By default the configured file location in is used. for VoicemailFileLocation. If you don't want to use the default, define the location. This needs to be a valid file location for the IVR to work.
- If you don't want to use the default text of the example, go to MessageTitle and define the title of the voicemail task displayed in the Subject field in Communication Panel.
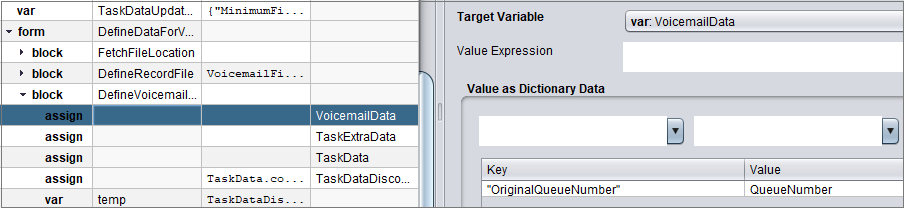
- In VoicemailData you add information you want to
show in Communication Panel.
To define them, go to the form element
DefineDataForVariables and use the
assign elements.
- In TaskData, the supported parameters for the
.QVoicemail.Create function are the
following:
TaskTitle
The title of the voicemail in the subject field.
RecordingFileName
TaskType
Type of the task, either EMAIL or XRI. The default is XRI.
TaskQueueAddress
Extension address of queue where voicemail tasks are added. You need to define this.
KeyValues
Dictionary containing key-value pairs.
Skills
Dictionary containing skill and skill value. The skill can be either a GUID or an ExternalName of the skill: {"ENGLISH": 5}
RequiredAgents
The format is { "ExpirationTime": time, "Agents": ["x", "y"] } where Agents (x,y) is either a phone number or user GUID.
MinimumFileSize
This is the minimum file size of the recording in bytes.
TaskBody
Body field, only relevant if TaskType is EMAIL.
To define them, go to the form element DefineDataForVariables and use the assign element.
- MinimumFileSize in bytes: If needed, change the value. If the file is smaller than the defined value, no task is created and the result of creation is an error. The purpose of this is to prevent a task creation when the customer hangs up and doesn't leave a voicemail message.
- If you don't want to create a task when the call is disconnected while being recorded, change the value in Expression on Disconnection to .QVoicemail.DeleteFile(RecordFile) in the record element. For example, you have audio prompts saying that finish the message with the key [x] and you don't want to create a task when the call is disconnected.
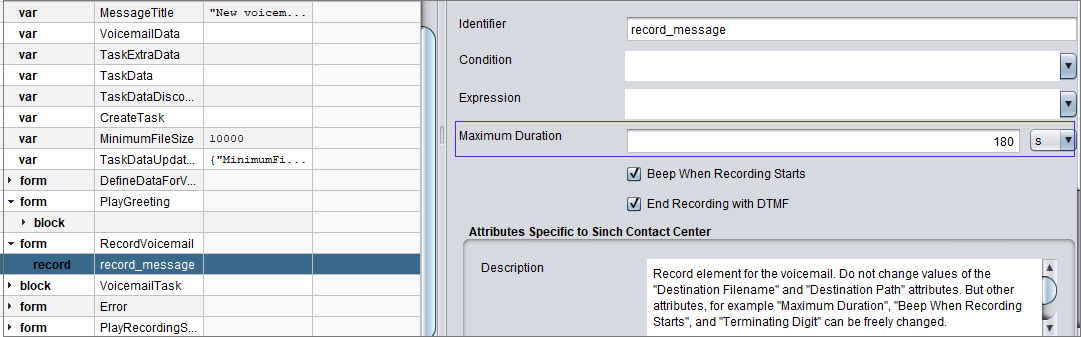
- To change the default duration of the voicemail recording, use the
setting Maximum Duration.
- Assign the correct audio prompts or remove prompts if they are not
necessary.
- Save the IVR application and close the view.
- Active the IVR.
You may want to use different email queues for tasks based on the type of phone queues you have. You can also have several voicemail IVRs in your system. The easiest way is to copy your voicemail IVR and make the needed changes. Or you can modify your IVR for example by defining the variables based on conditions.