Configuring Microsoft Teams integration
With this integration, you can synchronize a user's status between Sinch Contact Pro and Microsoft Teams. When an agent's status in Microsoft Teams changes to Busy, their status in Sinch Contact Pro changes automatically to Not ready. When an agent is handling a call in Sinch Contact Pro, their status in Microsoft Teams changes automatically to Busy or Do not disturb, according to configuration.
Overview
The following image describes the status change from Sinch Contact Pro to MS Teams.

The following image describes the status change from MS Teams to Sinch Contact Pro.

Before configuring the integration, you need to decide if you'll use a technical user in your configuration or not and follow the relevant instructions. Not using a technical user is simpler to configure but may result in slower status updates.
To integrate Microsoft Teams with Sinch Contact Pro, do the following:
- Create a service request to Sinch.
- Configure Azure settings.
- Configure in System Configurator (SC):
- Microsoft Teams messaging service
- Presence synchronization settings
- User group and user settings to bind users as MS Teams users
Azure configuration when not using a technical user
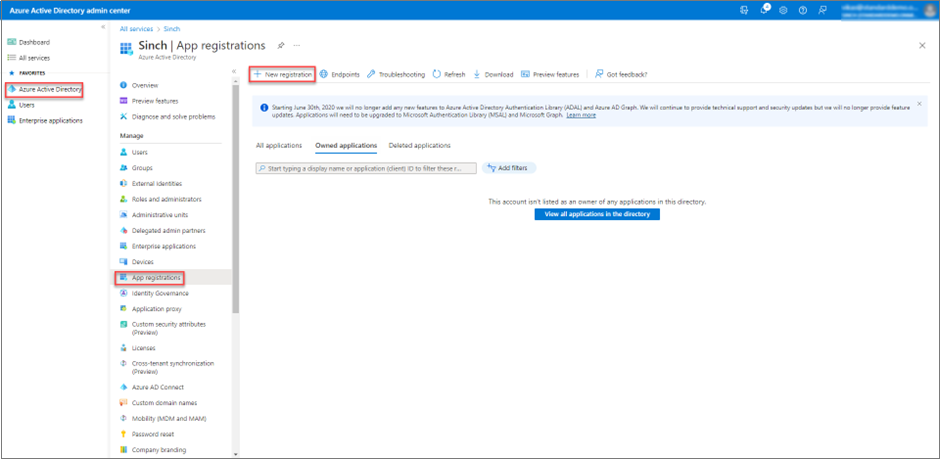
Register an application
Go to and click New registration.
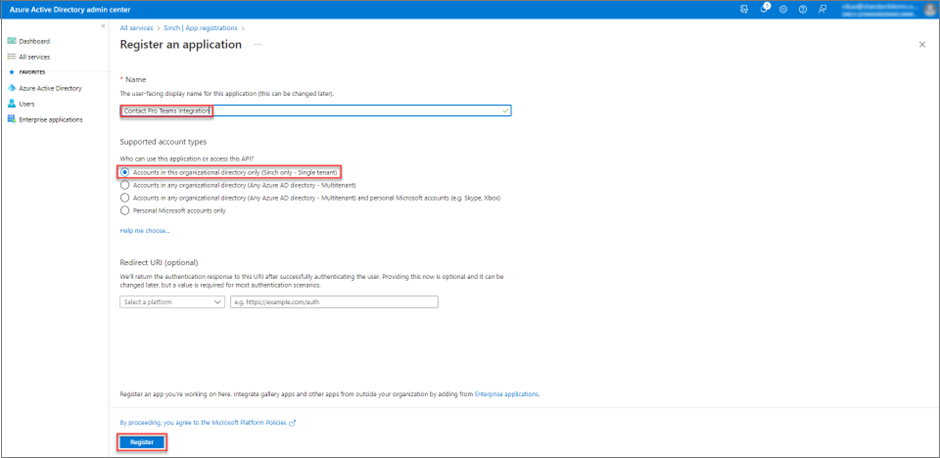
Name the new application and select the options as in the screenshot below and click Register.
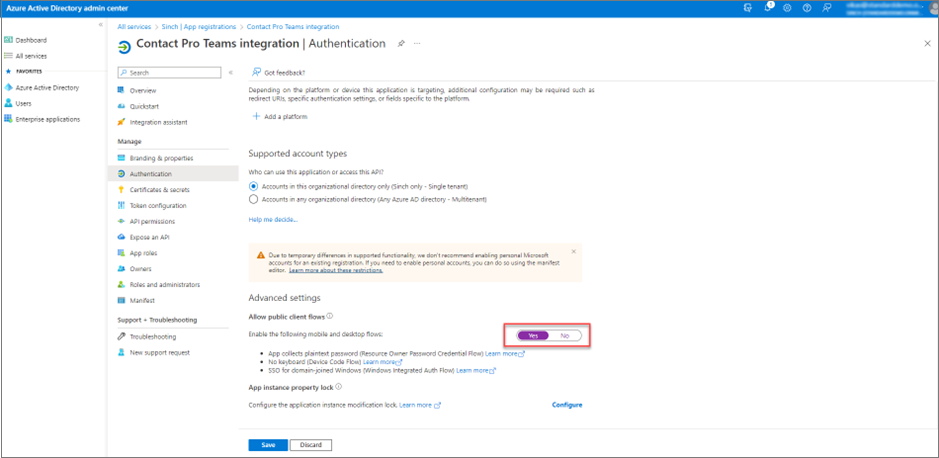
Allow public client flow and save.
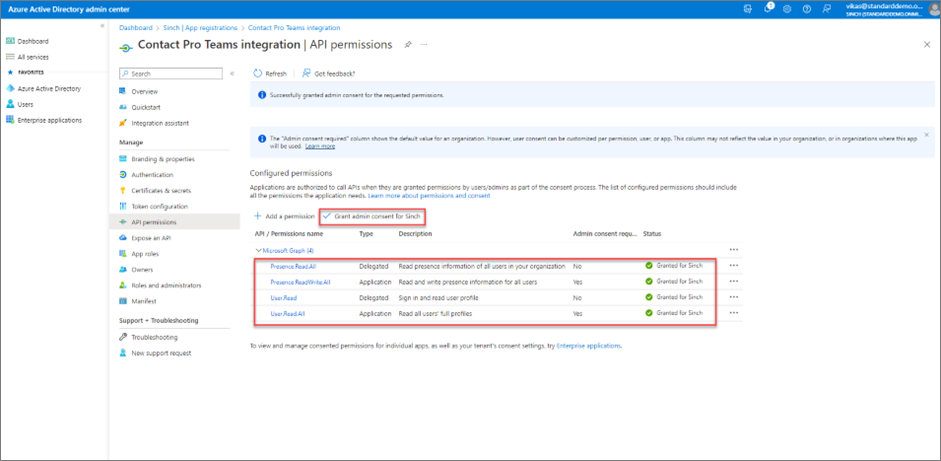
Give API permissions to the application and grant admin consent for Sinch.
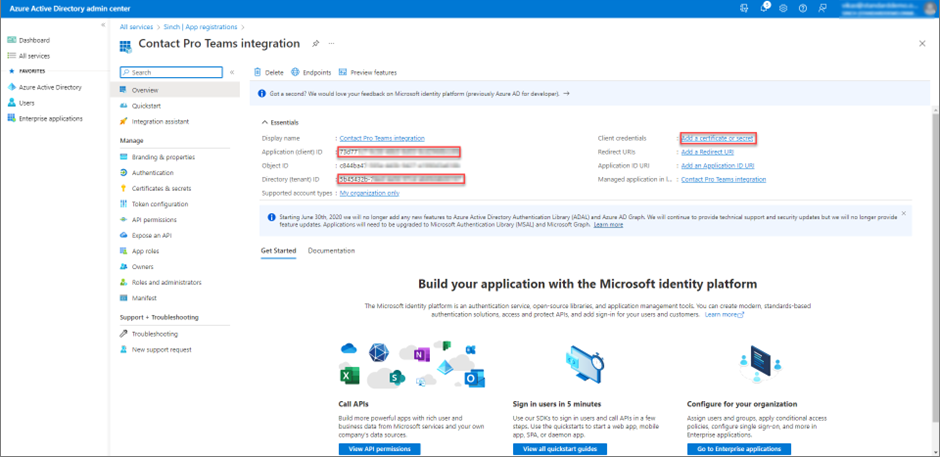
Open the newly created application, create a new client secret, and copy and paste the value of the secret, for example, into the Notepad. Copy and paste the following values into the Notepad:
Application (client) ID
Directory (tenant) ID
Client secret value, the one created above.
Azure configuration when using a technical user
Disable security default
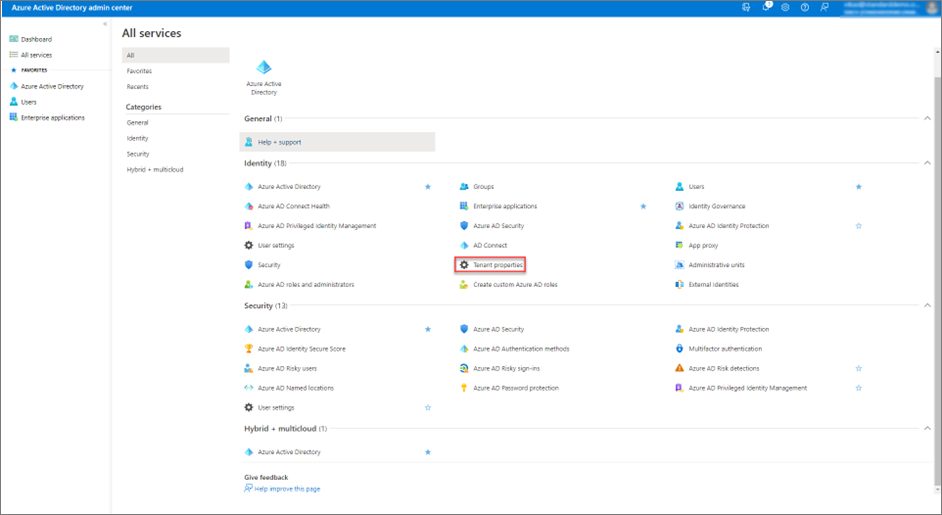
Open the Azure portal https://portal.azure.com/ and the page where all services are listed.
Find and open the Tenant properties.
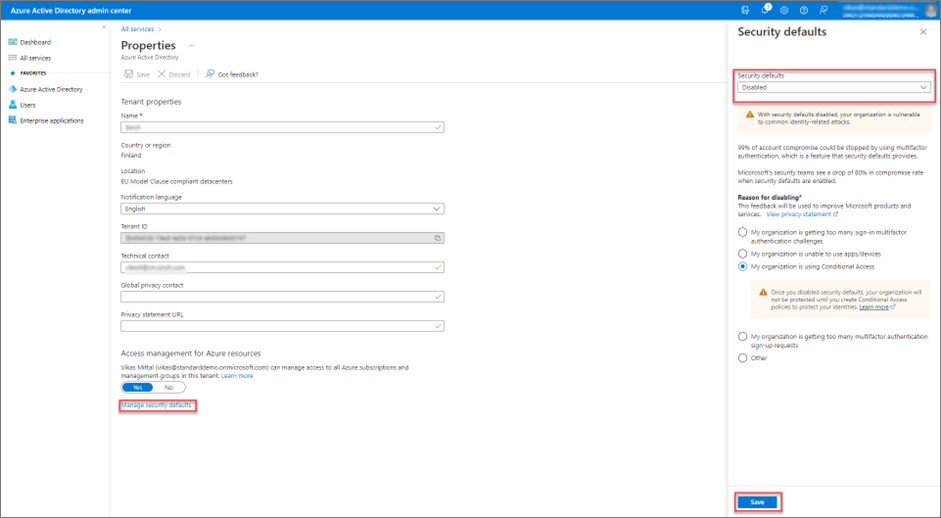
If you use the integration to update user presence from Teams to Sinch Contact Pro and from Sinch Contact Pro to Teams, click on the Manage security defaults and disable them.
The reason to disable them is that the technical user connecting to Teams from Sinch Contact Pro is currently unable to handle MFA. To strengthen and keep the same level of security, enable Conditional Access.
If you only use the user presence update from Sinch Contact Pro to MS Teams, you can skip this step.
Register an application
Go to and click New registration.
Name the new application and select the options as in the screenshot below and click Register.
Allow public client flow and save.
Give API permissions to the application and grant admin consent for Sinch.
Open the newly created application, create a new client secret, and copy and paste the value of the secret, for example, into the Notepad. Copy and paste the following values into the Notepad:
Application (client) ID
Directory (tenant) ID
Client secret value, the one created above.
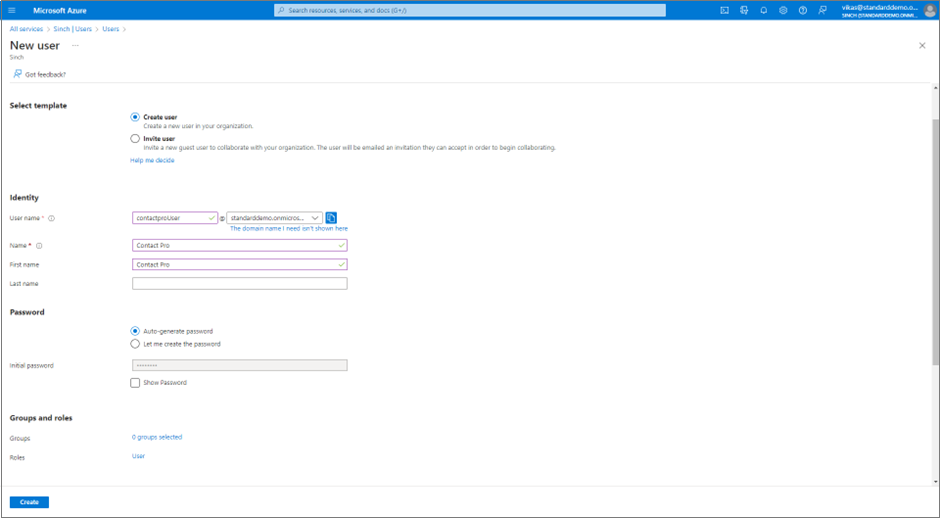
Create a technical user
Create a technical user to connect to the application with delegated permissions to fetch presences of other users.
For Sinch Contact Pro to connect to Teams, the MFA authentication needs to be disabled for this technical user.
Log in to Teams using this newly created technical user, activate the account and change the initial password.
SC configuration
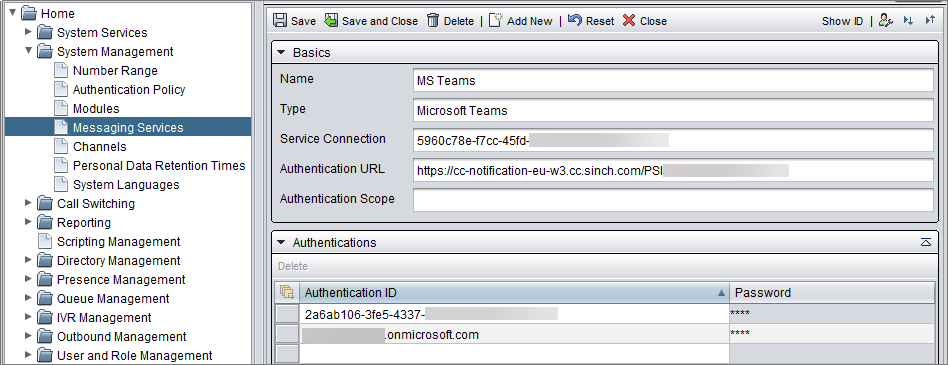
Configure MS Teams messaging service
Go to .
Click Add New and choose Microsoft Teams.
In the Basics block, enter the following:
Name: a descriptive name
Service Connection: the directory (tenant) ID from the Azure Active Directory admin center
Authentication URL: If you're not using a technical user, you can leave this empty. If you're using a technical user, this is the URL of the Presence Synchronization Interface (PSI).
Choose the URL according to your tenant location:- Europe: https://cc-notification-eu-c1.cc.sinch.com/PSI/<tenantid>/api/notification
- North America: https://cc-notification-na-w2.cc.sinch.com/PSI/<tenantid>/api/notification
- Australia: https://cc-notification-au-s2.cc.sinch.com/PSI/<tenantid>/api/notification
- Africa: https://cc-notification-af-s1.cc.sinch.com/PSI/<tenantid>/api/notification
In the Authentications block, enter:
the Azure Application (client) ID as an authentication ID and its secret as the password field
the technical user name as an authentication ID and its password in the password field if you created a technical user in Azure.
Save the messaging service.
Configure presence management
Go to .
In the Microsoft Teams Integration block, select which system's user presence you want to update:
Update User Presence to Teams: from Sinch Contact Pro to Teams
In the Busy status field, select the status you want to show in Microsoft Teams when the user is in a call in Sinch Contact Pro
Update User Presence from Teams: from Teams to Sinch Contact Pro
To synchronize between the systems, select both.

Save the presence settings.
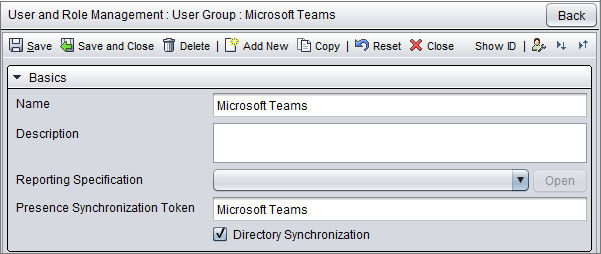
Define MS Teams users
Go to and choose the user group that uses Teams.
In the Basics block, add Microsoft Teams as Presence Synchronization Token and save.
Go to and add a presence ID to the Presence Synchronization ID field.
This is the Teams ID which is the Microsoft user's UserPrincipalName, usually same as the email.

Save the user settings.