Direct Facebook Messenger Integration
This procedure is for a direct integration with Facebook Messenger. We recommend using the integration via Conversation API.
You can receive customer messages via your Facebook page when you have an application with Messenger connected to the Facebook page.
Integration Overview
The integration utilizes three different components: SMS Server, Facebook Messenger, and the Facebook Webhook service, configured with the Facebook application. The purpose of the Webhook service is to monitor Facebook Messenger page. If a new chat is initialized, the Webhook delivers the message to a preconfigured destination. In this case the destination is the SMS Server that takes care of incoming and outgoing chat messages.
Configuring Facebook Messenger
The configuration may change so you should check the latest instructions from Facebook.
- If you already have a developer account, open https://developers.facebook.com
and log in.
Otherwise create or promote an existing Facebook account by clicking the Log In button. For more information, see https://developers.facebook.com/docs/messenger-platform/guides/setup.
- Go to My Apps and click Add a New App.
- Insert details for your new application.
- Assign new products to your application:
- Go to the Add a Product section and select Messenger.
- Click Set Up.
A new application with the Messenger is created. Now you connect this application to a Facebook page. If you don't have one, create it at https://www.facebook.com/pages/create.
- Assign the Facebook page with Messenger in and then select your page.
A popup window is opened requesting a permission. Accept it.
- Enable the Webhooks service by scrolling down the page to the Webhooks section and clicking Setup Webhooks.
- Configure a new page subscription:
- Insert a callback URL that points to Sinch Contact Pro.
You receive this from Sinch but depending on the AWS region in which your service is running, the format is:
Region URL Europe https://login-eu-c1.cc.sinch.com/[tenantname]/sms/facebook/facebook North America https://login-na-w2.cc.sinch.com/[tenantname]/sms/facebook/facebook Australia https://login-au-s2.cc.sinch.com/[tenantname]/sms/facebook/facebook Africa https://login-af-s1.cc.sinch.com/[tenantname]/sms/facebook/facebook - Add a random string, for example 12345678, to the Verify
Token field.
A verify token is required although it's not used by Sinch Contact Pro.
- In the Subscription Fields section, select messages.
- Click Verify and Save.
If everyting works, you'll see Webhooks icon turning to green on the left pane. An error message is displayed if Facebook fails to connect .
- Insert a callback URL that points to Sinch Contact Pro.
- Add a Send Message button to your Facebook page by opening the page and clicking Add a Button.
- Click the Contact you row.
- Select Send Message and click Next.
- Select Facebook Messenger and click Finish.
Creating Facebook Messenger Service in Sinch Contact Pro
-
Configure a Facebook messaging service in :
- Click Add New and choose facebook.
- In the Basics block, enter:
- a descriptive name for the messaging service
- https://graph.facebook.com/v10.0/me/messages as a service connection.Note:The API version in the URL can change. You should use the latest version.
- In the Authentications block, enter:
- Facebook app ID and secret
The system will work without the configuration of app ID and secret but then there is no security check. Therefore, for security reasons, we recommend that you configure them.
- One or more entries of page ID and page access token
Table 1. Facebook Configuration Item Authentication ID Password App
There can be only one app in Sinch Contact Pro.
Enter app ID located in with a prefix app:.
For example: app:1234567890123
Note:Only one account can have the app: prefix.
Enter the app secret located in .
Page
There can be as many pages as needed.
Enter page ID located in .
Enter page access token located in .
Note:If you change your Facebook password, you have to generate a new token in and enter it here as a password.
- Facebook app ID and secret
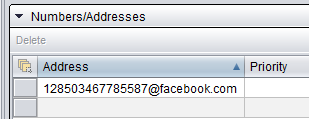
- Create a chat new queue or update an existing one in and as a queue address add
[PageID]@facebook.com.

Depending on the configuration, one queue can handle multiple pages, or there can be one queue per page.
