Entering basic user information
You must have rights to create users, or to modify the user’s settings, and to create and to view phone, e-mail and chat extensions. You also need rights to view user settings templates.
You use this procedure to start creating new user accounts into the system.
- On the System Configurator main screen, choose .
- Choose Add New.
- Choose Basic.
- Configure the settings according to the following table.
Field
Function
First Name
Enter the first name of the user. This field is mandatory.
Last Name
Enter the last name of the user. This field is mandatory.
Title
Enter the user’s title.
Location
Enter the location for the user.
The location setting related to call switching is defined in the Contact Settings block.
Time Zone
The time zone where the agent is located. The workstation where the end-user application is run sends the time zone information to this field and therefore there usually is no need to update this field.
User Interface Language
Choose the user interface language. The user can change the user interface language in Communication Panel.
Prompt Language
Choose the language in which the prompts are played. If no language is selected, the User Interface Language is used.
This language is used as the prompt language in the contact center internal calls placed by the user (for example when calling other users and being forwarded to their presence IVR), and in calls to the user originating from outside the Sinch Contact Pro system. In outgoing calls made by the user, the system default language is used instead of the defined prompt language.
User Settings Template
Choose the template for the user.
If a user does not have a user settings template, directory services are not available. Additionally, the template defines, for example, whether users can change the settings defined for them and which directory fields are available to them.
Number
Enter the extension number.
If your system has subranges, you can use the plus (+) icon which finds the next free number and enters it to the field. Otherwise use the Number Viewer tool to check which numbers are available and unused in the system.Note:Make sure you don't use any national emergency number as an IVR, a user, or a queue number.If you are creating a user that serves only in email or chat queues or only as an external agent in phone queues, you must nevertheless enter an extension number for the user. The extension number is required by CEM.
Chat Address
If the user handles chat contacts, enter the chat address for the user.
The chat and e-mail address can be the same.
Ensure that you also select the option Enable Multi-Chat in Contact Settings for the user on either the template or user level. This is needed for the chat function in Communication Panel.
Chat Name
Enter a name that is shown as the user name in chat discussions.
E-Mail
Enter the user’s e-mail address.
The chat and e-mail address can be the same.
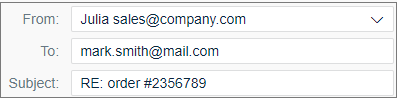
Email Display Name
To show a display name in addition to the email address to a email recipient, enter the name here.

When creating a new email or replying to an email, agents in Communication Panel see this name and their email address in the From address list. Select also the option Use E-Mail Address in Sender's E-Mail Replies.
Use E-Mail Address in Sender's E-Mail Replies
Select this option if you want that the e-mail address entered into the E-Mail field is available in an e-mail’s From field of a user in the end-user application.
Selecting this option allows users to:
-
Choose their own e-mail address even when they reply to queue e-mails.
The reply is then sent to the user’s own e-mail and not to the pending list.
-
Create new e-mail messages.
Mobile Number
Enter the mobile phone number (such as +49151234567).
-
- Save your entries.